We used 6 men's shirts ("waste not, want not") but you can use any fabrics you like.
It's easy to make this quilt in a day, once the shirts are cut up. Plus you'll have enough fabric for two throw quilts... you can give one as a gift!
(For continuous listings of free quilt patterns, please check us out on Twitter !
For low-cost books, magazines, and jewelry, check us out on E-Bay - we're Top Rated Sellers! )


THROW QUILT or PICNIC QUILT: approx. 48” x 56”
The quilt was made from 6 different shirts. For a nice contrast, select light and dark shirts.*
Cut each shirt as follows: Remove the cuffs, collar, back yoke, and seam allowances.
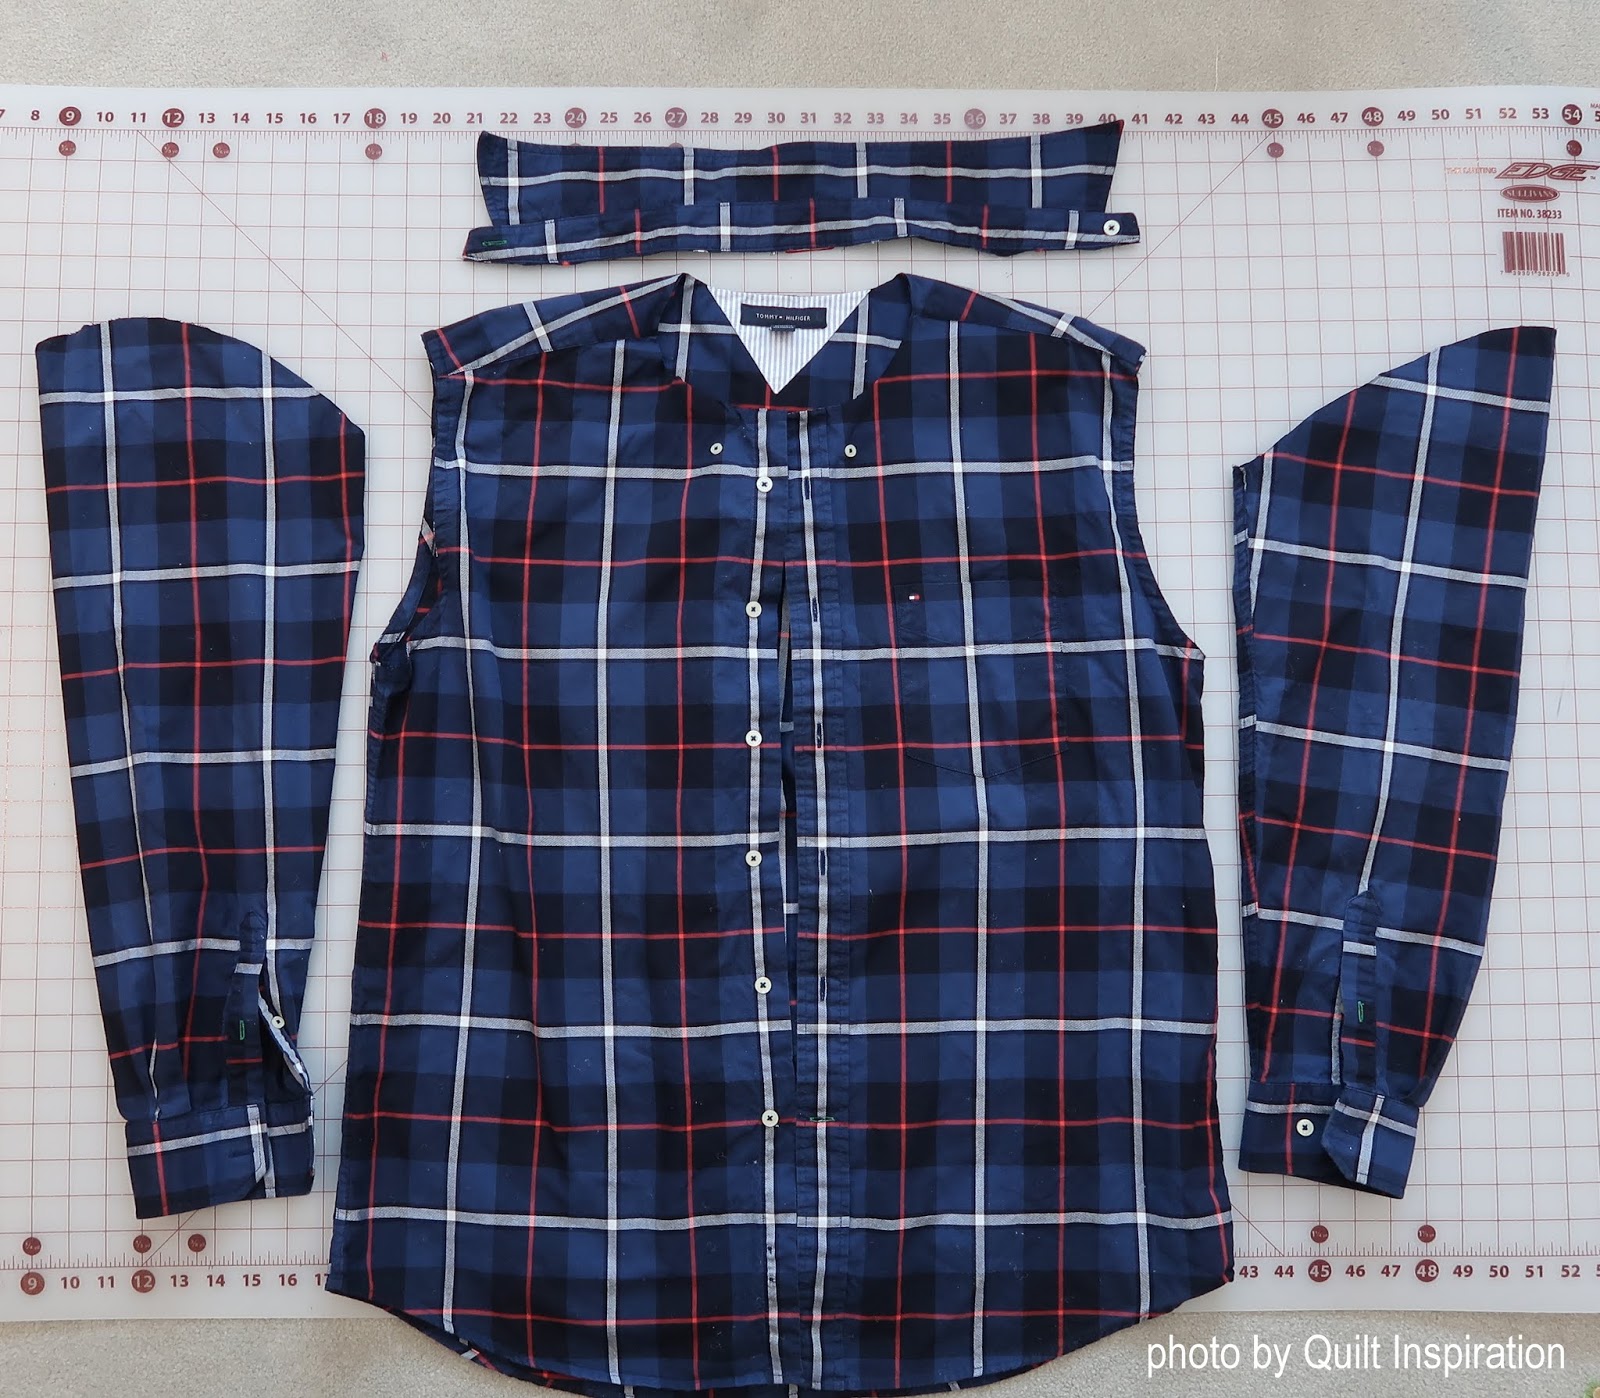

We love this dark blue plaid by Tommy Hilfiger !

Cut the back into 4.5" strips:

Remove the shirt pocket and the front placket buttons, and open up the front button placket. Then cut the shirt fronts into 4.5" strips:

Do the same for the sleeves:

You will end up with short and long strips ranging from 10" to 27". Before making the quilt top, square off the ends of each strip.
SEWING THE QUILT TOP
You will be sewing each color into one long ribbon of that fabric, alternating short and long pieces.
Step 1. First, separate Dark Blue Plaid strips into short and long pieces. Join them end to end, as shown below.

Continue in this fashion, alternating short and long strips of the same color, until you have one very long Dark Blue Plaid ribbon. Depending on the size of the men’s shirt (M-XL), the ribbon will range from 120” to 150” long.

Quick Sewing Tip : Use chain piecing to join pairs of strips. The project will go even faster. :-)

Step 2. Repeat Step 1 for each one of the other fabrics, making long ribbons of each color.

Step 3. Cut each long ribbon into 30.5” and 18.5” pieces according to the chart below.

Step 4. Referring to the photo and the diagram below, lay out the 30.5” and 18.5” strips. Each row will have one 30.5” strip and one 18.5” strip. Stitch them together to make a row.


STEP 5. To complete the quilt top, join the rows along their length until all 14 rows are joined.
Sewing Tip : Sew the first row to the second row starting from the left hand side of the quilt top. Then sew strip set 1+ 2 to strip 3 starting from the right hand side of the quilt top. This helps the quilt to lie flat. We also used a walking foot to piece the long rows.

For more patriotic inspiration: How about a project that is already cut and ready to sew from new fabrics? Check out our PRE-CUT FABRIC KIT for this "Parade of Stars" table runner at our shop at E-Bay !


Image credits: *We made a few changes to the final shirt selection, but you get the general idea. ~ Photos and design are by Quilt Inspiration. Please do not copy or re-post this tutorial without written permission.


Very nice tutorial! Making a quilt from shirts is on my "to-do" list :)
ReplyDeleteI like your method for this great quick quilt and it turned out so cute! Could make in school colors for grads or so many other great combos. Thank you for the tutorial!
ReplyDeleteA friend of mine lost her husband not too long a go and this would make a great memory quilt from his shirts!! Thank you for the wonderful inspiration! --Erik
ReplyDeleteWish I had seen this before my kids got rid of all my husband's shirts. Well, I think they went to the homeless who would like them better the way they were... but...
ReplyDeleteGood tutorial for a great re-purposing project
ReplyDelete